
Summer is drawing to an end and I must return from the long vacation I gave myself from blogging. The quilting has continued throughout, of course, so there is plenty to talk about.
This post is largely intended to inspire you to create your own custom utilitarian items, using your quilting skills. You will see the insight to be gained from such projects. In attempting my first wallet, I considered what I want to have with me, so that I am free from a larger purse. In my case, that is ID, space for credit and reward cards, cash and my smart phone. I wished to have a handle so that my hands can be free when shopping.
As the phone was the largest item, I calculated the finished size based on it’s dimensions X 3, and made a quilt sandwich about an inch larger all around, to allow for fabric covered by binding and that taken up by the quilting. After quilting, it looked like this: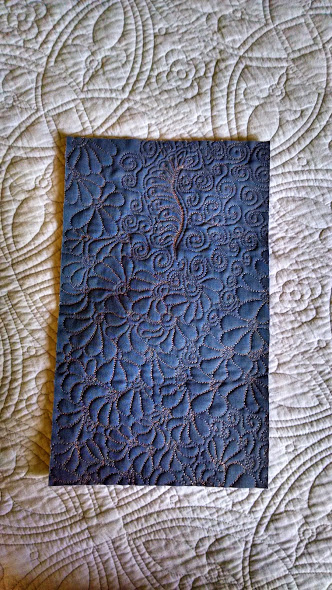
I used one fabric for my wallet, but this would also provide an opportunity to be creative. Keep in mind that you will eventually have to sew many layers together, and avoid extra seams at the edges. The batting provides some extra protection for my phone, but you could use something with less weight if your machine has trouble with many layers.
One end was then folded up, for the phone pocket, and fabric was accordion folded and sewn to the outside of the pocket in a way that fit the number and size of my cards. (See below)

(In designing your own wallet, it might make more sense to arrange the card pockets on the side opposite the phone pocket, to create fewer layers.)
The handle loop is added at this point. I used a detachable fastener purchased at JoAnn Fabrics, I created the handle and loop at the same time by folding in raw edges on the long side and stitching. I then cut off a piece long enough for the loop on the wallet itself and attached it now. Here is a view taken after the binding is added (unfortunately). It does show that I chose to put it on the inside so that it is concealed at times I am not using the handle.

So there we have it. Add binding all the way around and you are finished. As you can see, there is nothing precision needed to design your own items, just a willingness to experiment and come up with an item that meets your needs and can be adapted for gifting.
