Tag Archives: quilting

Vintage Quilt Remake Progress

Quilting has been a daily event most of the week, as I finish up a few projects and continue to work on this one.  I finally have a project together that will hopefully keep my hand quilting skill intact through the long winter evenings.  It is a peaceful, relaxing activity at the end of the day.

Here is the previous photo of the quilt as it arrived.Vintage quilt on arrival

As you can see in the photo below, I have used 36 of the original 100 blocks, so I’m sure these will appear here again some day.  It measures about 58″ square, which will make a nice sized lap quilt for the garden.IMG_20151109_175859

After taking the original squares apart from each other, I squared up the corners with the quarter circles and added white borders to make each 8 1/2 “.  The fans were then arranged in circles, which was a bit like assembling a puzzle, as thy were irregular in size.IMG_20151107_102402687

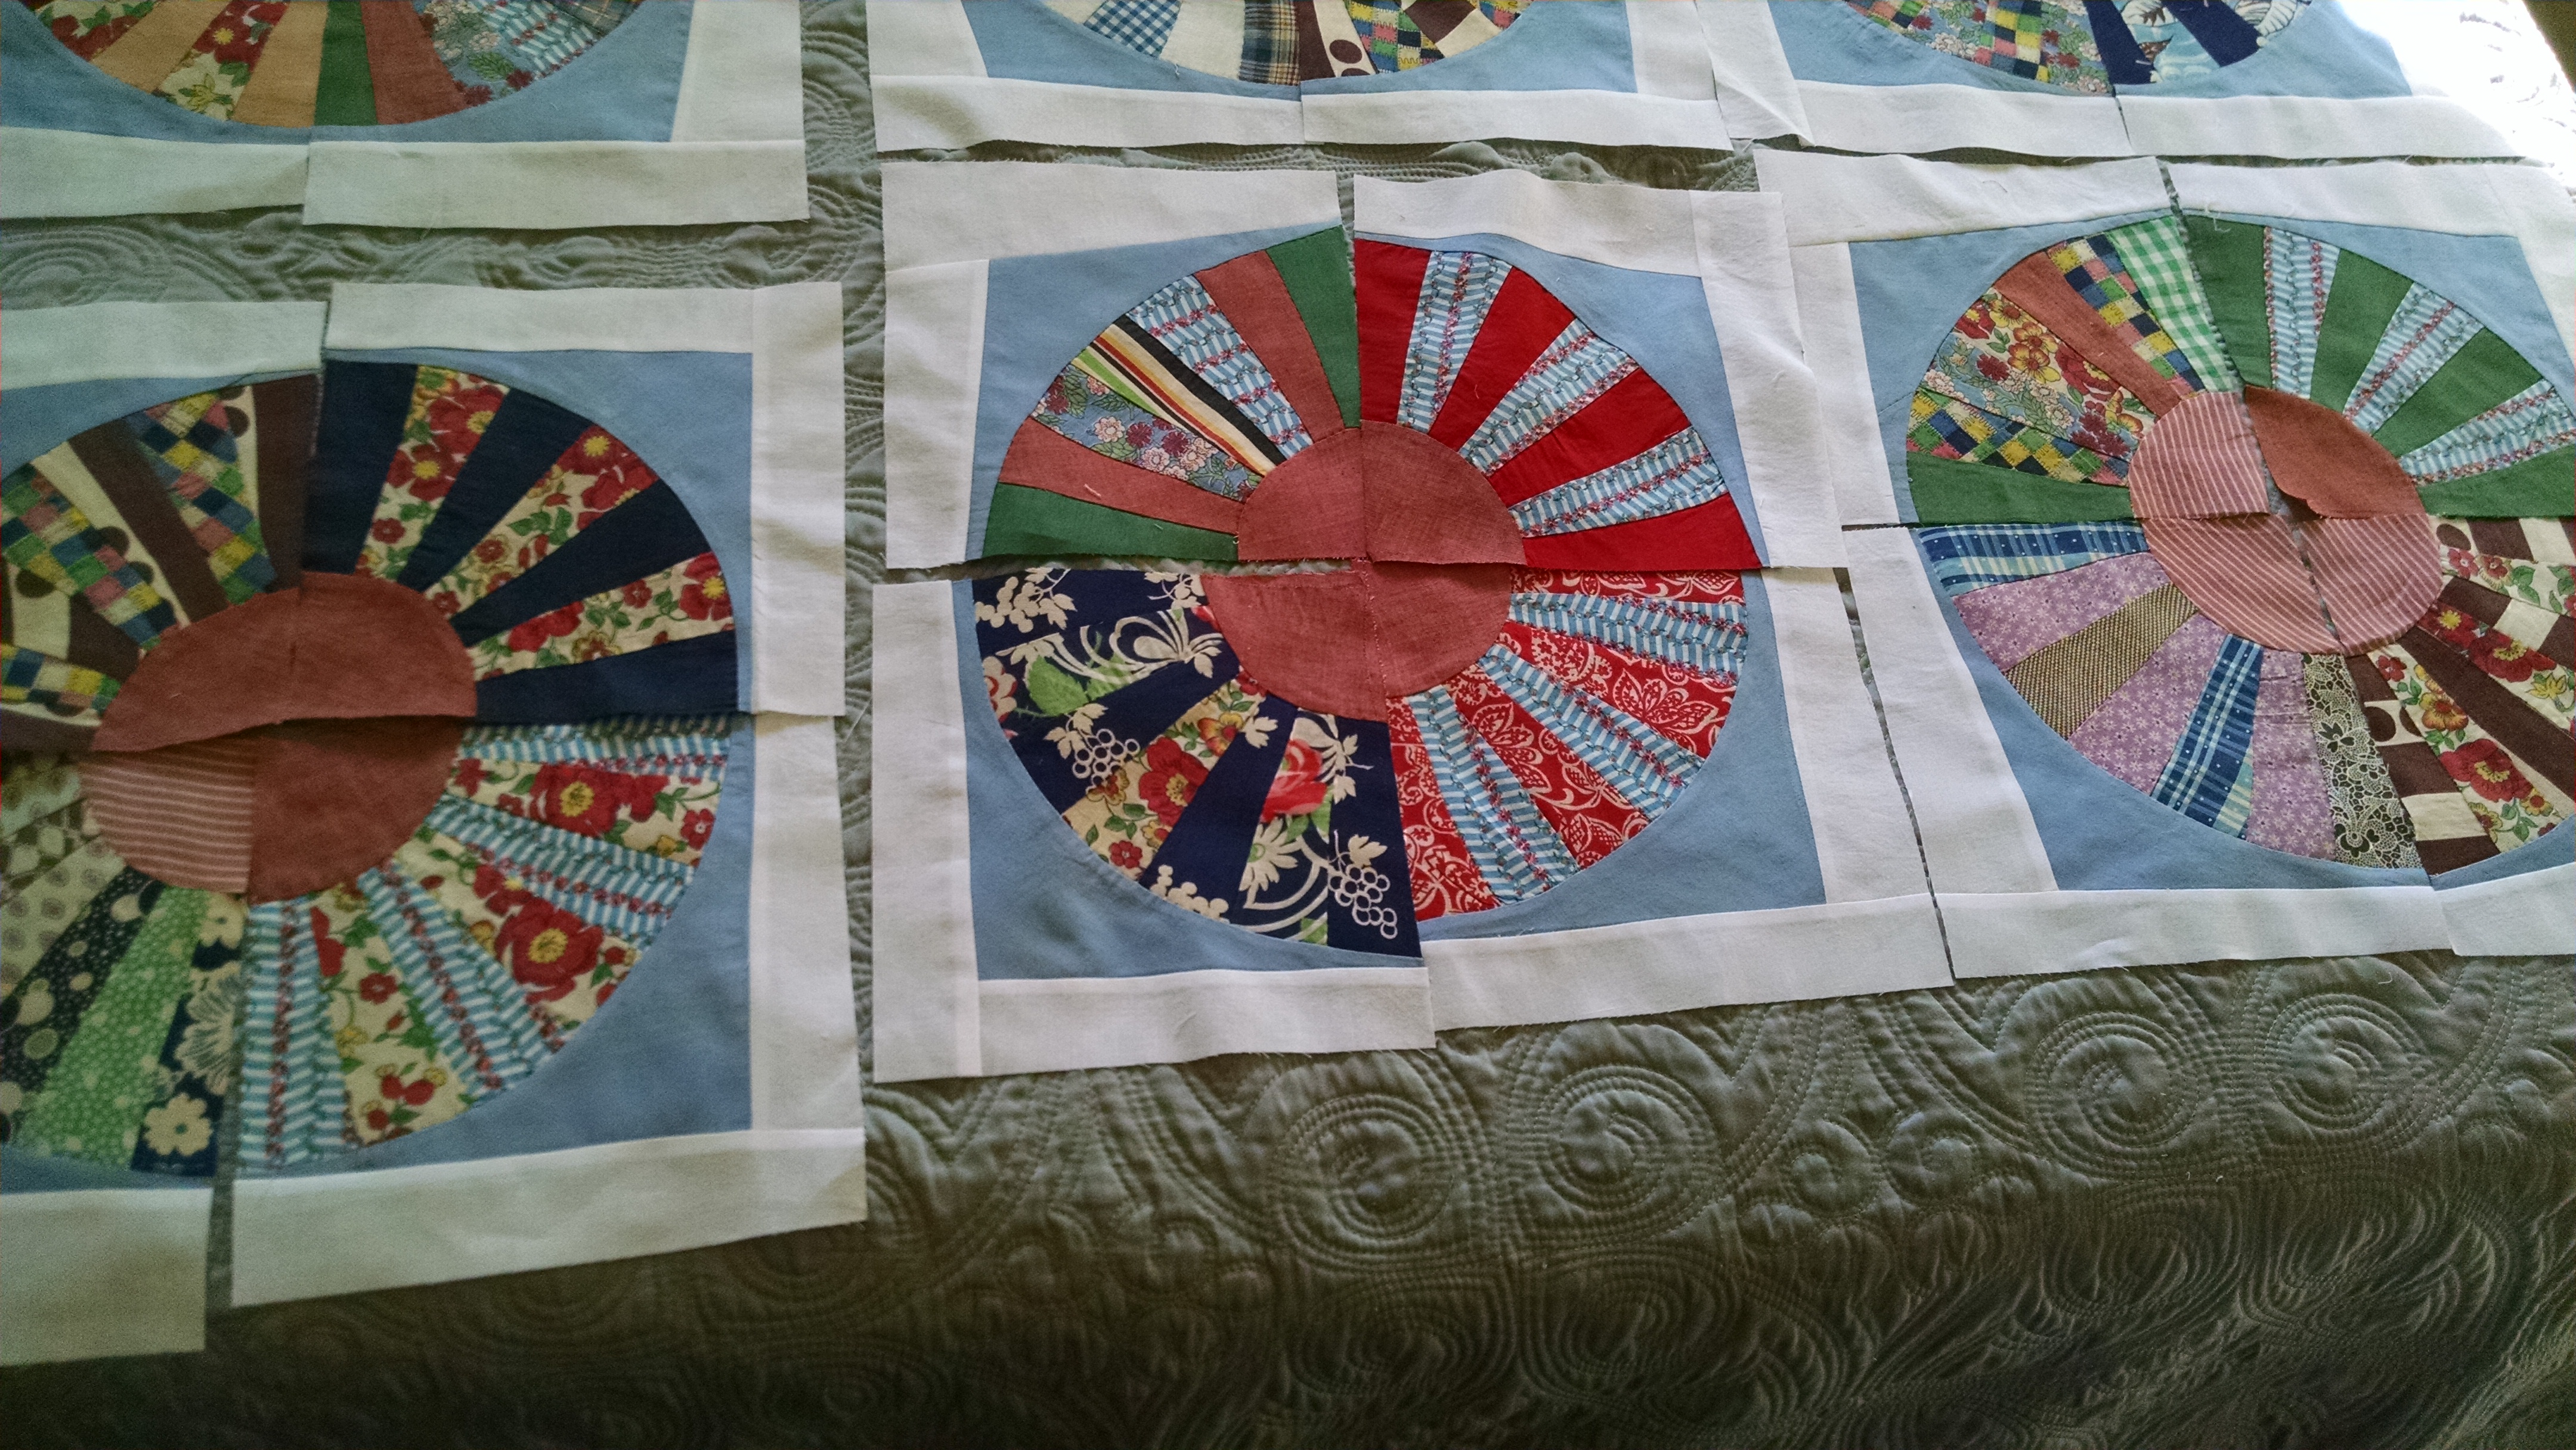
Once this was accomplished and they were sewn together, they were attached to each other with 2″ borders and another 2″ border surrounds the whole thing.

It goes into my hoop tonight, which means it might be done by the end of the winter…maybe.

Advertisement

It’s a Mystery

IMG_20151029_111445741Here it is.  Piles of pieces, which my local quilt club, Midland Quilters Squared, tells me will become a quilt suitable to be shown in their show next spring.  This is my first mystery quilt experience, and I have some doubts.  This could be in part because my edges aren’t exactly even.   What is this?

IMG_20151029_151341628

And how about this?IMG_20151029_111513501

There will obviously have to be some fudging involved.  I can’t very well start fudging until I get the gist of what is to come, though.  It is called “The Cat’s Meow”, so some of you may have knowledge of the pattern.  I stuck with plain fabrics in case there are actually cats involved, thinking I can dress it up with quilting.  Now you see why I am not crazy about traditional quilting.  I’d say I may not be very good at it.

I’ll show you my vintage quilt rescue progress in my next post.  That was so badly pieced that I will again feel good about my skills.

Meanwhile, feel free to send me your best piecing tips in the comment section.

Too Many Coffee Breaks

Paper Pieced Coffee Quilt

Believe it or not, I actually do quilt almost every single day.  Blogging about the work as I go, however, has not been my strong suit.  Maybe if I bring this quilt to my PC for coffee breaks, I could write a few lines about what I am working on daily.

You may have noticed that I don’t have a lot of interest (or ability, for that matter) when it comes to piecing by a pattern. It is exciting to me to try many different techniques, with the expectation that some trend will develop in my quilts, but thus far that hasn’t happened.  That being said, I am currently working on a quilt club “Mystery Quilt” which is involving hundreds of little pieces, which may (or may not) evolve into a neat, precise whole.

Also in the works, thanks to Tim Latimer  (see timquilts.com)  is a redesign of a vintage quilt top rescue.  I am still in the process of deconstruction, but have a plan in mind.  More on that later this week.

The third project in the works, which will also appear in days to come, is a baby quilt, designed in the black, white and bright colors that are of the most interest to infants.

So back to my Coffee Break Quilt.  I found a free paper-pieced pattern for the coffee cup on Pinterest, selected colors that make me happy, and surrounded the blocks with those colors in solids, to give me a nice background for machine quilting.  The backing is flannel, to make it a nice cozy quilt for actually curling up with a hot beverage.  Here’s a close-up, for a better look at the quilting.

Coffee Break detail
Coffee Break detail

Revisiting Portrait Quilting

Izzy on sax quiltIzzy saxIzzy on the Sax copy

My talented granddaughter recently experimented with the alto sax.  (This proud grandma can’t avoid mentioning the fact that she is proficient on the flute, but I’ll refrain from listing her other wonderful talents and attributes, so that we can get back to the quilting.)  I liked this photo so much that I wanted to try a wall hanging from it.  Here is the process used:

  1. The first step was using a photo editing program to posterize, change to gray scale, and enlarge the photo.  The enlarged photo was then printed in sections.  You may have to think through programs available to you, to accomplish this.  Once printed, the sections were overlapped and taped, to recreate the picture.
  2. Use a broad marker to outline the shapes you will use as patterns.
  3. I decided there were areas of background that could be pieced at random, and prepared these next.  (As the first photo shows, this included mainly areas to the upper right and upper left)  These were then attached to a light muslin base the size of the completed quilt.
  4. I now started building the images of granddaughter and sax from background pieces up, by tracing the desired area onto tracing paper and cutting them from my chosen fabric, already attached to a fusible backing.  These were pressed in place, sometimes directly onto the muslin, but at other times (such as in completing the face)  the pieces were first assembled by ironing them onto a non-stick surface.   An applique pressing sheet was used, but the release paper from a previous fusing process also works.  As pieces were added to the muslin they were machine stitched, using both straight and decorative stitches.  (Unfortunately the photos for this post are not clear enough to show detail, but this means you will freely use your own imagination.)
  5. When the image was complete, I chose to add borders, then a quilt sandwich was formed (quilt, light weight cotton batting and backing fabric) and was bonded together with basting adhesive.
  6. Now came the fun part.  Free-motion quilting was used to add dimension to everything.  If this is not joyful for you, however, a machine straight stitch would work just fine for all the quilting.
  7. A traditional binding was then attached.

While I enjoyed the process of this, my second portrait quilt, it has probably become just another chapter in my quilting education.  I am ever drawn onward to learning new techniques.  If another portrait quilt is attempted, I believe it will be more spontaneous and abstract.  But half the fun in this learning process is finding out what happens next!

Feel free to ask questions in the comment section, and I would love to hear about your quilting experiences.